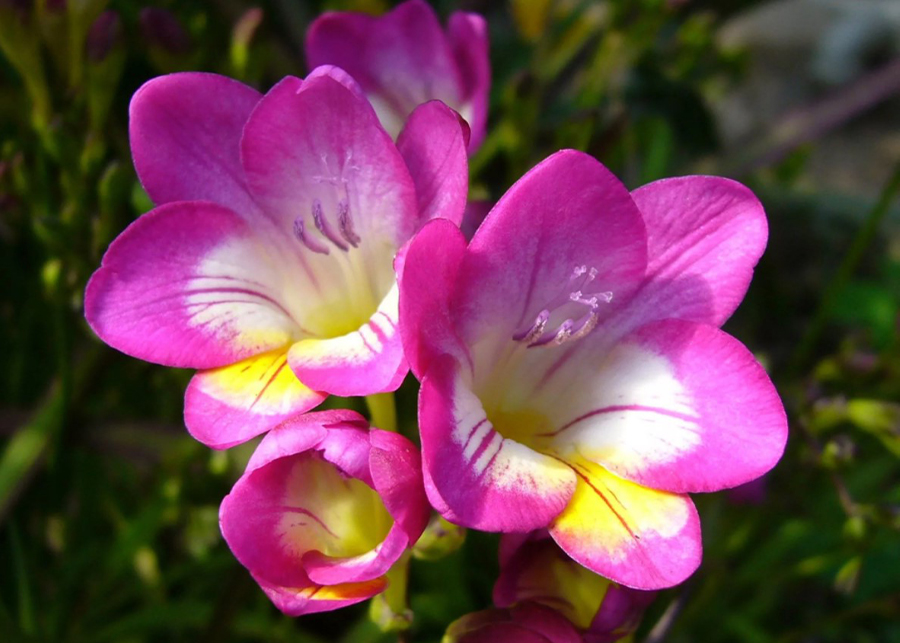
Are you tired of opening your drawers and closets only to be greeted by musty odors? Do you long for a fresh and fragrant scent every time you reach for your clothes? Look no further than a freesia sachet! In this article, we will show you how to make a delightful freesia sachet that will not only freshen up your storage spaces but also add a touch of elegance.
Making your own freesia sachet is a simple and rewarding project. With just a few materials, including dried freesia flowers and essential oils, you can create a beautiful sachet that will infuse your clothes with a delightful scent. Whether you are a seasoned crafter or a beginner, this step-by-step guide will walk you through the process, ensuring that you achieve the best results.
So, gather your materials and get ready to embark on a fragrant journey. Let’s dive into the world of freesia sachet making and discover how you can transform your drawers and closets into aromatic havens.
Gather the Materials
Before you begin making your fragrant freesia sachet, it’s important to gather all the necessary materials. Here is a detailed list of everything you will need:
- Dried freesia flowers
- Fabric
- Needle
- Thread
- Essential oils
These materials are essential for creating a beautiful and aromatic sachet that will freshen up your drawers and closets. Make sure you have all the items ready before you proceed with the next steps.
Prepare the Dried Freesia Flowers
Before you can create your fragrant freesia sachet, it’s important to properly dry the freesia flowers. This will ensure that they retain their fragrance and are ready to be used in your sachet. There are different methods you can use to dry freesia flowers, and each method has its own benefits. Let’s explore these methods and learn how to preserve the fragrance of the flowers.
Method 1: Air Drying
The traditional method of air drying freesia flowers is a simple and effective way to preserve their fragrance. To air dry the flowers, start by gathering a bunch of fresh freesia stems. Remove any leaves from the stems and tie them together with a string or rubber band. Hang the bunch upside down in a cool, dry place away from direct sunlight. Allow the flowers to dry naturally for about two to three weeks. Once the flowers are completely dry, gently remove them from the stems and store them in an airtight container to maintain their fragrance.
Method 2: Using a Dehydrator
If you’re looking for a quicker drying method, using a dehydrator can be a great option. Start by spreading the freesia flowers in a single layer on the dehydrator trays. Set the dehydrator to a low temperature, around 95°F (35°C), and let it run for several hours. Check the flowers periodically to ensure they are drying evenly. Once the flowers are crisp and dry, remove them from the dehydrator and store them in an airtight container. This method helps to retain the fragrance of the freesia flowers while speeding up the drying process.
By following these methods, you can properly dry your freesia flowers and preserve their delightful fragrance. Now that you have your dried freesia flowers ready, it’s time to move on to the next step of creating your own fragrant freesia sachet.
Method 1: Air Drying
When it comes to drying freesia flowers, the traditional method of air drying is a popular choice. This method allows the flowers to naturally dry while retaining their delightful fragrance. Follow these steps to air dry your freesia flowers:
- Start by gathering a bunch of fresh freesia flowers. Choose flowers that are in full bloom and have not started to wilt.
- Remove any excess leaves or foliage from the stems of the flowers.
- Tie the stems together with a string or rubber band, creating a small bouquet.
- Hang the bouquet upside down in a well-ventilated area, such as a sunny room or a covered porch.
- Ensure that the flowers are not touching each other and have enough space for air circulation.
- Allow the flowers to dry completely. This process can take anywhere from one to three weeks, depending on the humidity levels in your area.
- Once the flowers are fully dried, gently remove them from the stems and store them in an airtight container or a sachet for future use.
Air drying freesia flowers is a simple and effective method that allows you to enjoy their fragrance for an extended period. By following these steps, you can ensure that your dried freesia flowers retain their scent and add a pleasant aroma to your homemade sachets.
Method 2: Using a Dehydrator
When it comes to drying freesia flowers quickly and efficiently, using a dehydrator is an excellent alternative method. This method ensures that the flowers retain their fragrance while being dried thoroughly. Here, we will guide you through the steps involved in using a dehydrator and provide tips for achieving optimal results.
To begin, gather your dried freesia flowers and prepare your dehydrator. Make sure the dehydrator is clean and in good working condition. If necessary, refer to the manufacturer’s instructions for specific settings and temperature recommendations.
Next, spread out the dried freesia flowers on the dehydrator trays, ensuring they are evenly spaced. This allows for proper air circulation and helps prevent the flowers from sticking together during the drying process. If you have a large quantity of flowers, you may need to use multiple trays or work in batches.
Once the flowers are arranged on the trays, set the dehydrator to the recommended temperature for drying flowers. Typically, a temperature range of 90-100°F (32-38°C) works well for drying freesia flowers. Avoid setting the temperature too high, as it may cause the flowers to lose their fragrance.
Allow the dehydrator to run for several hours, checking the progress periodically. The drying time can vary depending on the moisture content of the flowers and the specific dehydrator model. It is important to be patient and not rush the process to ensure the flowers are fully dried.
Once the freesia flowers are completely dry and crisp to the touch, remove them from the dehydrator. Let them cool down before handling to avoid any potential burns.
Now that you have successfully dried your freesia flowers using a dehydrator, you can proceed to assemble and fill your sachet. Refer to the corresponding subheadings for detailed instructions on how to complete the next steps.
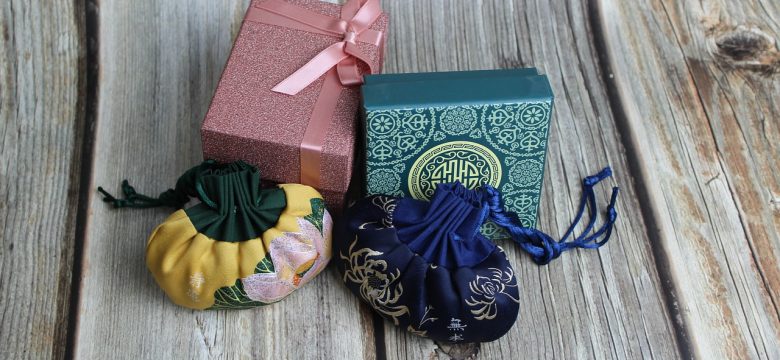
Assemble and Fill the Sachet
Assembling and filling the sachet is a crucial step in creating a beautiful and aromatic freesia sachet. Follow these instructions carefully to ensure the best results:
Step 1: Cutting and Sewing the Fabric
Start by selecting a fabric of your choice. Cut two identical pieces of fabric into your desired shape and size for the sachet. It could be a square, rectangle, or even a heart shape. Make sure the fabric pieces are large enough to hold a sufficient amount of dried freesia flowers.
Place the fabric pieces together, with the patterned sides facing each other. Use a needle and thread to sew three of the four sides, leaving one side open for filling. Double stitch the seams to ensure durability.
Step 2: Filling the Sachet
Once you have sewn the fabric, it’s time to fill the sachet with dried freesia flowers and essential oils. Start by adding a generous amount of dried freesia flowers into the sachet. You can also mix in other dried flowers or herbs for a more personalized scent.
Add a few drops of your favorite essential oil onto the flowers to enhance the fragrance. Lavender, rose, or jasmine essential oils work well with freesia. Be careful not to saturate the flowers with too much oil, as it may make the sachet too damp.
After filling the sachet, sew the open side shut using a needle and thread. Make sure the stitches are secure to prevent any leakage of flowers or oils.
Now that your sachet is assembled and filled, it’s ready to be used. Place it in your drawers, closets, or anywhere you want to enjoy the delightful scent of freesia. Over time, the fragrance may fade, but you can easily refresh it by adding a few more drops of essential oil onto the sachet.
By following these simple steps, you can create a beautiful and aromatic freesia sachet that will infuse your surroundings with a delightful fragrance.
Step 1: Cutting and Sewing the Fabric
When it comes to creating your freesia sachet, the first step is cutting and sewing the fabric. This crucial step sets the foundation for your sachet, ensuring that it is the perfect shape and size to hold your dried freesia flowers and essential oils.
To begin, gather your chosen fabric and lay it flat on a clean surface. Measure and mark the desired dimensions for your sachet using a ruler and fabric pen or chalk. This will help guide you as you cut the fabric.
Next, carefully cut along the marked lines, ensuring that you have smooth and even edges. Take your time with this step to ensure precision and accuracy.
Once you have cut the fabric into the desired shape and size, it’s time to sew the pieces together. Thread your needle with a coordinating thread color and tie a knot at the end.
Using a simple running stitch or a more decorative stitch if desired, sew the edges of the fabric together. Make sure to leave a small opening so that you can fill the sachet with dried freesia flowers and essential oils.
After sewing the edges, trim any excess thread and turn the fabric right side out. Your fabric sachet is now ready to be filled with the delightful fragrance of dried freesia flowers and essential oils.
Step 2: Filling the Sachet
Now that you have assembled your fabric sachet, it’s time to fill it with the delightful combination of dried freesia flowers and essential oils. This step is crucial as it determines the intensity and longevity of the fragrance that will emanate from your sachet.
To ensure maximum fragrance, it’s important to evenly distribute the flowers and oils within the sachet. Here are some tips to help you achieve this:
- Tip 1: Start by adding a layer of dried freesia flowers to the bottom of the sachet. This will serve as the base and provide a strong foundation for the fragrance.
- Tip 2: Next, add a few drops of your chosen essential oil onto the flowers. Be careful not to oversaturate the sachet as this can overpower the fragrance.
- Tip 3: Gently shake the sachet to distribute the oil evenly among the flowers. This will help infuse the fragrance throughout the entire sachet.
- Tip 4: Repeat the process of layering dried freesia flowers and adding essential oil until the sachet is filled to your desired level. Remember to distribute the oil evenly with each layer.
- Tip 5: Once you have filled the sachet, gently press it to release any trapped air and ensure the flowers and oil are tightly packed together.
By following these tips, you can create a fabric sachet that is not only visually appealing but also emits a captivating and long-lasting freesia fragrance. Enjoy the delightful scent as it permeates your drawers and closets, bringing a touch of nature’s beauty to your everyday life.
Using and Refreshing the Sachet
The freesia sachet is not only a beautiful addition to your drawers and closets, but it also serves a practical purpose of freshening up the space. Here are some instructions on how to use and refresh your freesia sachet to ensure its longevity and effectiveness.
Using the Sachet:
- Place the freesia sachet in your desired location, such as a drawer or closet.
- Allow the natural fragrance of the dried freesia flowers and essential oils to infuse the space.
- Enjoy the refreshing scent every time you open the drawer or closet.
Refreshing the Scent:
Over time, the fragrance of the freesia sachet may fade. Here’s how you can refresh its scent:
- Open the sachet and gently crush the dried freesia flowers to release their aroma.
- Add a few drops of essential oil to the sachet to enhance the fragrance.
- Close the sachet and give it a gentle shake to distribute the oils and reactivate the scent.
By following these simple instructions, you can continue to enjoy the delightful fragrance of your freesia sachet for an extended period. Remember to refresh the sachet as needed to maintain its effectiveness.
Frequently Asked Questions
- Can I use fresh freesia flowers instead of dried ones?
No, it is recommended to use dried freesia flowers for making the sachet. Drying the flowers helps preserve their fragrance and prevents them from rotting inside the sachet.
- How long will the scent of the sachet last?
The duration of the scent depends on various factors such as the quality of essential oils used and the storage conditions of the sachet. On average, the scent can last for several weeks to a few months. To refresh the scent, you can add a few drops of essential oil to the sachet.
- Can I use other flowers instead of freesia?
Yes, you can experiment with different flowers to create your own unique scent. Lavender, rose petals, or jasmine flowers are popular alternatives that can be used in combination with freesia or on their own.
- How do I clean the sachet?
To clean the sachet, gently hand wash it with mild soap and lukewarm water. Avoid using harsh chemicals or bleach as it may damage the fabric or affect the fragrance. Allow the sachet to air dry completely before refilling it.
- Can I use the sachet in places other than drawers and closets?
Absolutely! The sachet can be placed in various areas such as your car, bathroom, or gym bag to add a pleasant fragrance. It can also be used as a decorative item in your living space.